 Skip to content

Where to Place a Logo on Custom Beanies for Maximum Brand Visibility?
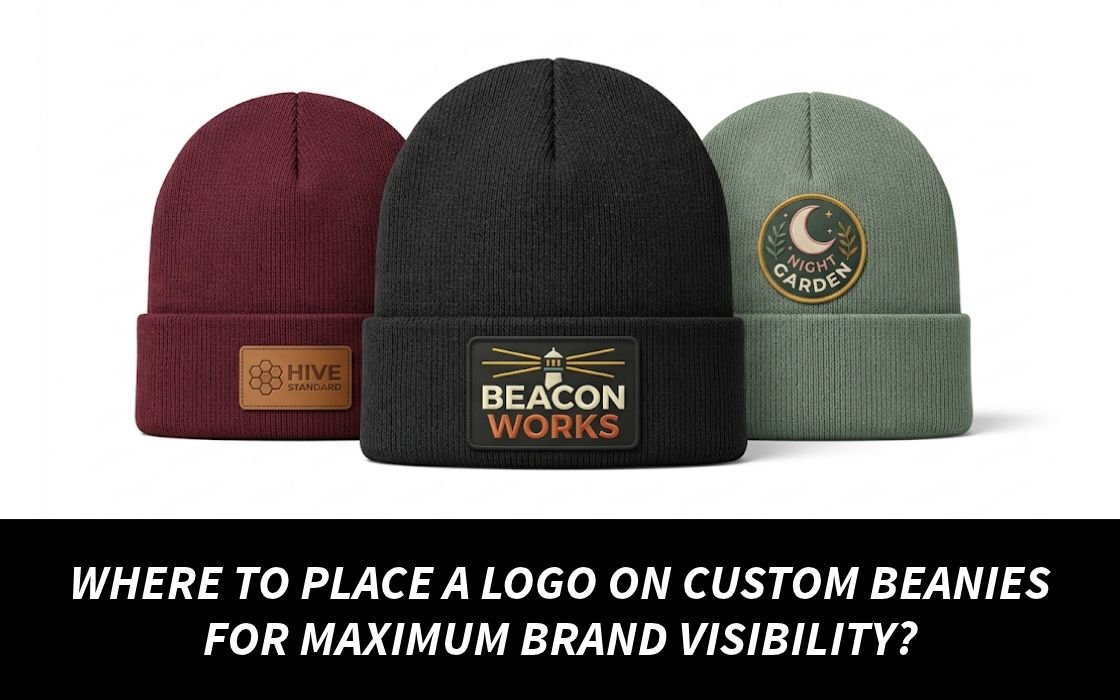
The best option for your main goal of brand visibility is putting the logo in front of the folded cuff of a custom beanie. It is because this ensures that your mark stays within the line of vision of everyone.
The choice also depends on the type of beanie, the logo shape, the decoration style, target market, and even the way the beanie will be worn. This is especially important when creating beanies with logo designs for different audiences and purposes.
So, for instance, a company purchasing 200 pieces of embroidered custom beanies for their team will need a completely different solution than a streetwear brand selling limited edition winter accessories.
One strong recommendation here: if visibility is your goal, do not think about side placement even if it is a trend since the logo visibility will be much better if placed on the front cuff.
Most industry experts prefer the front cuff of custom beanies, as it provides a stable base for embroidery, plus the logo will be seen above the forehead.
Quick Answer
- Best overall: Front-center cuff
- Best for subtle branding: Front-left or front-right
- Best for detailed artwork: Woven or leather-style patch
- Best for secondary information: Back cuff
- Best for cuffless beanies: Lower front area
These placements can help you create beanies with logo designs that match your branding goals while still looking comfortable and stylish.

Why Front-Center Usually Wins for Brand Visibility?
A cuffed beanie provides a looser knit surface. Due to the fold of the cuff, there is more space for embroidery, which is naturally placed facing people as the person wearing it looks forward.
One should keep the logo 3 to 4 inches wide and about 1.5 to 2 inches tall. On the other hand, this will vary depending on the height of the cuff, design of the logo itself, knit construction, and type of decoration.
Do ignore these numbers, since a 3-inch wide wordmark logo will look great while a 3-inch square logo might appear too bulky in the same space. The crucial point here is the usable decoration area, not a blind copy of one supplier’s numbers applied to all beanies.
Front, Side, Back, or Crown: Which Placement Should You Choose?
Logo Placement | Visibility | Best Use | Main Drawback |
Front Center | Very high | Corporate teams, events, promotions | Less fashion-forward |
Front left/right | High | Lifestyle and retail brands | Less visible from straight ahead |
Back cuff | Medium | Taglines, websites, secondary marks | Easy to miss |
Side | Medium | Minimalist or premium branding | Smaller viewing angle |
Front crown | Medium-high | Cuffless and slouch styles | Knit movement can affect clarity |
For most promotional campaigns, the front-center cuff makes the safest choice because it balances visibility, readability, and production practicality.
Your Logo Size Should Match the Beanie, Not Your Website
One mistake that occurs often is sending the same logo file from a website or any other print media to an embroidery service provider. This is of no use since embroidery changes artwork into stitches and flexible fabric easily stretches inside. But it can be avoided by making sure that the designer changes the artwork by getting rid of the small font, narrow lines, gaps, and unnecessary elements.
To prepare the original artwork in vector format, the designer should work in Adobe Illustrator. This is important because professional embroidery software lets the embroidery company control stitching, lining and sequencing.
A Simple Logo-Placement Framework
Use the STYLE → SPACE → SIZE → STITCH → SAMPLE framework before approving your custom beanies.
1. STYLE
Start with the beanie style as cuffed, cuffless, slouch, or pom-pom as these will affect the amount of branding space available.
2. SPACE
Do a detailed measurement of the decoration area instead of just assuming that every beanie gives the same area.
3. SIZE
Always start with a practical size, which can be 3 inches wide and 1.5 inches high, and work from there as per the logo and manufacturer’s size limit.
4. STITCH
One must ask the decorator to check out the stitching density, small letterings, amount of thread, and the design on the knitted beanie.
5. SAMPLE
One must approve a digital mock-up and should ask for a sample of the beanie in case of large or expensive orders.
Real Workflow: From Logo File to Finished Beanie
Log file → vector cleanup → embroidery digitization → mock-up of placement → review of stitches → physical sample → production → final quality check.
For instance, let’s say that a coffee company orders 300 black cuffed beanies for their staff and winter customers. At the end of the process, order specification would record the beanie style, logo size, colors of threads, placement, production technique, and approved work file.
Front Logo or Side Logo? A Real Decision Scenario
Imagine you manufacture a costly outdoor brand and you want your customers to use your beanies not just at your events.
If your promotion is according to the need for quick recognition, employee identification, team spirit in sports, trade fairs, and giveaways then center should be your choice. This approach works particularly well for beanies with logo designs that need to be obvious from the front.
Otherwise, slight or complete side placement is useful if the promotion is relevant to fashion, retail, minimalist approach, or customers who may be uncomfortable with wearing promotional material.
To put it simply, maximum visibility and fashion appeal don’t match.
This difference might save you from having 500 beanies with your logo which don’t meet the needs of your customers.

Quick Checklist Before Production
- Define the style of the beanie before fixing the logo placement.
- Measure the usable space for the cuff or front decoration.
- Reduce small details to be embroidered.
- Maintain good contrast with the thread on the beanie.
- Fix the size of the final logo.
- Check the placement on an old mock-up.
- Approve the sample before producing in bulk.
- Store the final artwork and placement information.
- Check the sample for wrinkles, uneven areas, or misaligned parts.
Final Takeaway
The best location on a personalized beanie for your logo doesn’t come up from choosing the largest design available or copying measurements from any design that exists.
You should begin with the beanie type, then find out the usable area for a logo, then simplify your design, pick the ideal decoration technique and analyze how the logo looks when the beanie is worn.
Generally, the most useful logo placement on custom beanies is at the front middle position of the beanie. This makes front-center placement a practical choice for beanies with logo designs created for promotional campaigns, teams, and businesses. But the main surprise is that people might not want to wear your beanie, which is why your logo wouldn’t be visible.
You need to focus on your beanie type, logo placement, logo size, decoration technique, and comfort rather than treating them as individual factors.
Want to start making your own beanie? Begin with your logo, beanie style, amount you want to make, and how you’d like people to use your beanie.
FAQs
Is the front or side better for a beanie logo?
Front-center is better for better visibility, while side placement is better when you want to have something low-key and fashion-oriented.
How large should a logo be on a beanie?
A good starting point is about 3 to 4 inches wide by 1.5 to 2 inches high, though your manufacturer will be able to give you exact dimensions for decoration for the particular beanie you choose.
Should I embroider a detailed logo directly onto a beanie?
Not always, as small text, thin lines and delicate logos will be difficult to see clearly on a stretched fabric, whereas a woven/leather patch will look much better.
Is front-center placement always the best choice?
No, as the best placement for a logo depends on the purpose of your branding efforts.