 Skip to content
 Custom Patch Creation Process: From Your Idea to the Final Emblem
Every patch tells a story. Custom patch is used by brands; they are used in schools, military units, sports, nonprofits, and many creative projects as a way of giving out a strong message. People wear it proudly to show their unique identity. It’s a lasting emblem of a simple idea presented in multiple fields.
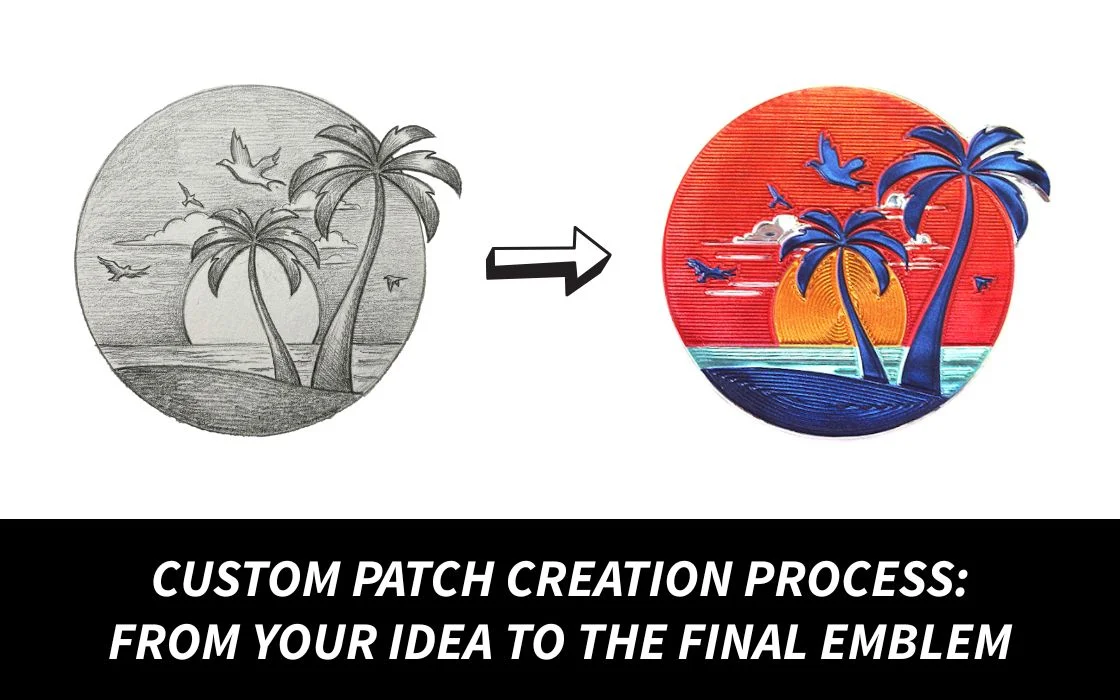
But have you ever wondered what this journey looks like? How does a simple idea go from a sketch to a concept and finally become a lasting emblem? How does it become a custom patch that you can hold in your hand or wear proudly?
Today, we’re breaking down the entire custom creation process step-by-step. We will give you a clear, engaging look at how your vision becomes a wearable piece of art.

Step 1: Your Idea Sparks the Process
Any big patch begins with your imagination. You may already have a logo. You have a sketch that is sloppy, maybe. Or perhaps you simply have a theme in mind and just require assistance to actualize it.
Whatever the starting point, this phase is concerned with identification:
- The message or meaning of your design.
- How would you like your patch to look?
- The location where the patch will be put (jacket, hat, backpack, uniform, etc.).
- The size and shape you prefer
- Mood or colors that you want to convey.
If you have a blurry concept in your head, write it down first. Show it to a professional custom patch creator. They will help you refine the idea and create something polished.
Got an idea you’d love to turn into a real patch? Start your design journey with Quality Patches.
Step 2: Selecting the Type of Custom Patch
Not all patches are the same. The kind you use influences the appearance. It has an impact on feel and durability, too, and even the cost.
The following are the most popular ones
Embroidered Patches
It’s a classic choice. Embroidered patches are bold and textured. Perfect for uniforms, jackets, caps, and all apparel.
Woven Patches
It is made with thinner threads for sharper detail. If you want small lettering and intricate lines, go for woven patches
Chenille Patches
It is thick, fuzzy. These are varsity-style patches ideal for jackets, hoodies. If you are designing statement pieces, it is the best choice out there.
PVC Patches
Soft rubber-like patches that are waterproof, modern, and extremely durable, popular with outdoor and tactical users.
Printed/Dye-Sublimated Patches
Best for photo-like designs or artwork with gradients.
Choosing the right types of custom patches makes all the difference. A patch would be of no use if it didn’t fit the purpose you have in mind. The right choice will stand out and serve your purpose, so always give time to that.
Step 3: Designing & Digitizing Your Artwork
Once you choose your patch type, it’s time to turn your idea into digital art.
Designing the Patch
A designer will refine your artwork by adjusting:
- Colors
- Borders
- Font clarity
- Scaling
- Backgrounds
- Shapes (circle, shield, rectangle, custom shapes, etc.)
If you don’t have a design, this is the stage where your idea gets transformed into something visual.
Digitizing: The Technical Magic
Digitizing means converting artwork into a stitch path that embroidery machines can read.
It determines:
- Stitch types
- Stitch count
- Thread directions
- Texture
- Density
A high-quality patch is based on good digitizing. That is why a few patches are crisp. While others look sloppy. Digitizers take into consideration that the last patch should be precise and long-lasting.
Step 4: Choosing Colors and Materials
Your patch’s personality comes to life through details.
You’ll choose:
- Thread colors
- Background twill or fabric color
- Border style (merrowed or laser-cut)
- Backing type
- Thickness and finishing
Many manufacturers offer Pantone color matching. It ensures your brand or artwork stays accurate.
A digital mock-up is usually provided during this stage so you can visualize the final patch before production begins.
Step 5: Selecting the Backing Style
Backing determines how your patch attaches to your gear or clothing. The right choice depends on how you plan to use it.
Here are the most common backing options:
Iron-On Backing
Excellent in the day-to-day activities and casual use.
Sew-On Backing
The most enduring and stable way of attachment.
Velcro Backing
These patches can be easily changed, and they are perfect when it comes to military, tactical, and outdoor gear.
Adhesive (Peel & Stick) Backing
Ideal in case of temporary events, giveaways, and handouts.
Pin Backing
Turn your patch into a wearable object.
The selection of the appropriate support is critical for functionality and sustainability.
Step 6: Reviewing & Approving the Mock-Up
Before production begins, you’ll receive:
- A digital proof
- A sample preview
- Sometimes a physical sample (if requested)
This step ensures everything looks exactly as you envisioned. You can request changes to colors. You can also ask for revisions for outlines, sizes, or overall design.
Once you approve the final design, production begins.
Step 7: Crafting Your Custom Patches
This is where your idea turns into something real.
For Embroidered Patches
The digitized file is stitched on twill fabric using machines.
For Woven Patches
Strands of thread are tightly woven in order to provide sharp detail.
For PVC Patches
PVC is made in liquid form and you pour it in custom molds by layers until you create your design.
For Printed Patches
The art is sublimated to a patch material through heat and pressure.
Patches are stitched or molded and then cut to shape with either a merrowed edge (rounded, clean finish), or laser-cut edges of specific shapes.
Each patch is checked to verify the accuracy of the design and then the final product will be an exact replica of your approved design.
Step 8: Fin
Step 8: Finishing, Quality Check & Packaging
Once patches are completed:
- Borders are trimmed
- Backings are applied
- Colours are compared to the mock-up.
- Edges are checked in terms of accuracy.
- The patches are packaged to ensure quality.
Your patches only get to shipping after being inspected.
Step 9: Delivery, Your Vision Comes to Life
The most exciting process: when your patch is finished.
What started as a thought on paper or even a mere discussion is now a completed custom patch that you can proudly wear, hang or pass out.
It is always a beautiful thing to see them in actual life, whether you are producing patches to brand, merchandise, uniforms and sports teams and clubs or yourself.
When you are not averse to making your idea into a complete patch, Quality Patches makes the entire process seamless, from concept to final emblem.

Why the Custom Patch Creation Process Matters
Understanding the process helps ensure:
- You get better results
- You decide which style and support.
- Your patch lasts longer
- You have an idea of what to expect at the start to the end.
- Your final patch is business-like and presentable.
Patches are not just art, they are symbols of identity that people are attached to. This is why the process of creating is equally important to the finished product.
Wrap up!
The process from idea to emblem is a combination of multiple things. There’s alot of creativity along with craftsmanship that goes into making a good custom patch. One should have the precision to create something bold, sentimental and expressive. The right process helps your patch turn out exactly the way you have imagined it. Or it can turn even better.
And when you want expert craftsmanship, easy communication, and flawless quality, Quality Patches is a trusted partner ready to bring your design to life.